22 Gorgeous Curly Hairstyle Ideas for Less Frizz

Beautiful curls do not need to look perfectly uniform to look polished. Whether you have loose waves, springy ringlets, or tightly coiled hair, the right hairstyle can make your natural texture easier to arrange while keeping flyaways less noticeable. The goal is to preserve curl definition, choose a comfortable shape, and build a styling routine that suits your hair.
Start with the basics: condition regularly, detangle gently, and choose a leave-in conditioner suited to your hair type. The American Academy of Dermatology recommends avoiding dry brushing on curly hair because it can contribute to breakage and frizz. A suitable leave-in conditioner can also improve manageability and reduce flyaways.
1. Defined Shoulder-Length Layered Curls
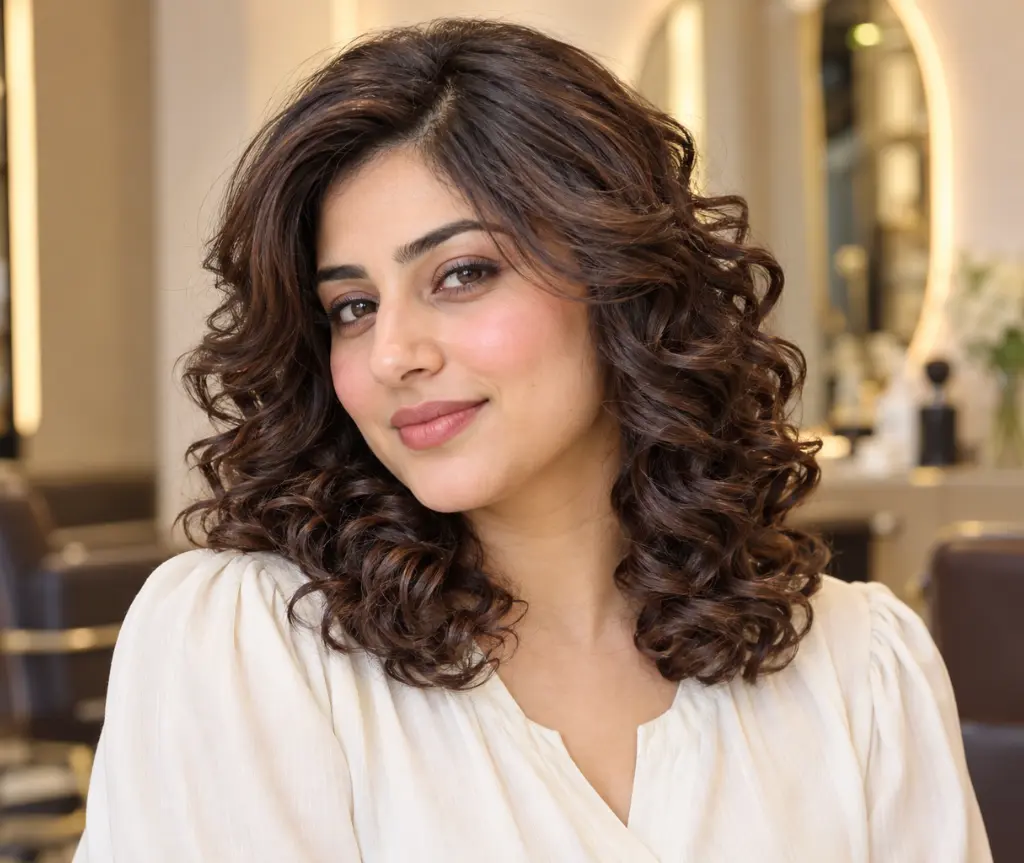
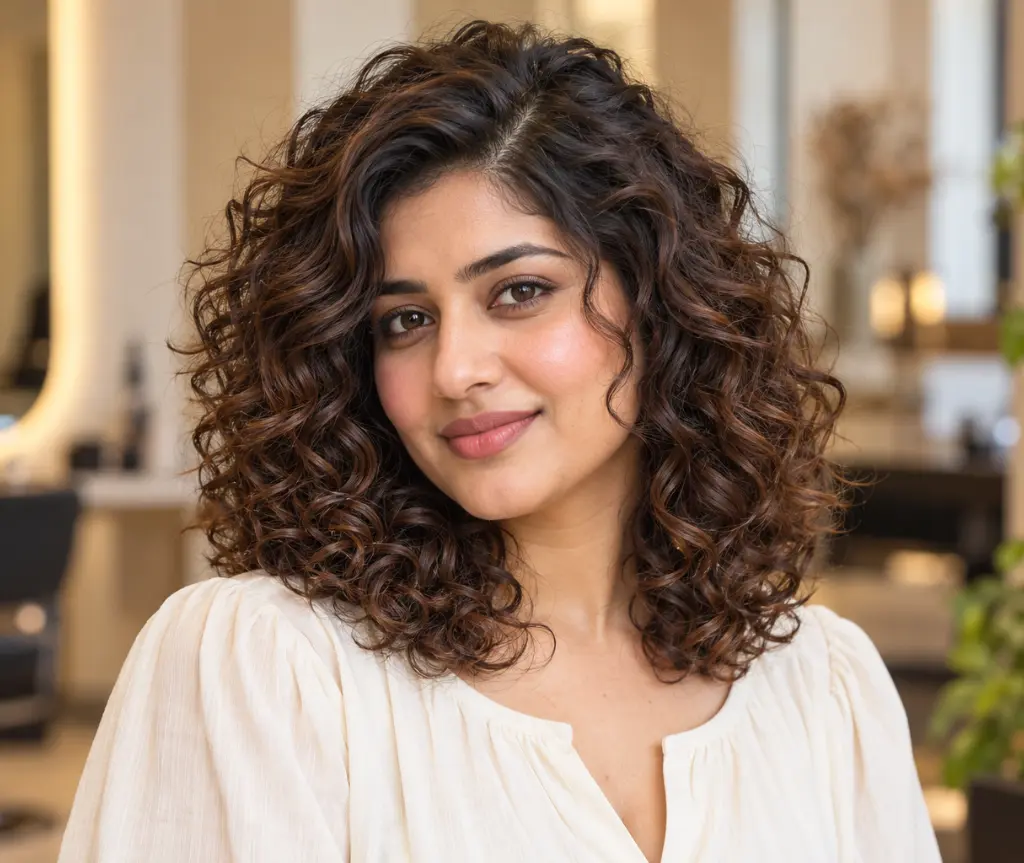
Shoulder-length layered curls offer a lovely balance between movement, fullness, and manageable length. Carefully placed layers give the hair a rounded silhouette while allowing individual ringlets to sit at different heights. This cute curly hairstyle is especially appealing when you want to wear your hair loose without having every curl collect around the ends. Ask your stylist to assess your natural curl pattern and shrinkage before choosing the shortest layer. A soft side part or slightly off-center part adds interest while keeping the overall finish easy to wear.
For styling, work in sections so the underside receives as much attention as the visible top layer. Try a small amount of leave-in conditioner followed by a curl gel that provides your preferred level of hold. Scrunch gently, then allow the curls to dry without repeatedly rearranging them. If the gel creates a firm cast, soften it with gentle scrunching once your hair is completely dry. Keep the roots relatively free of heavy products, especially on fine hair, and refresh individual misshapen curls instead of disturbing the entire hairstyle.
2. Chin-Length Curly Bob
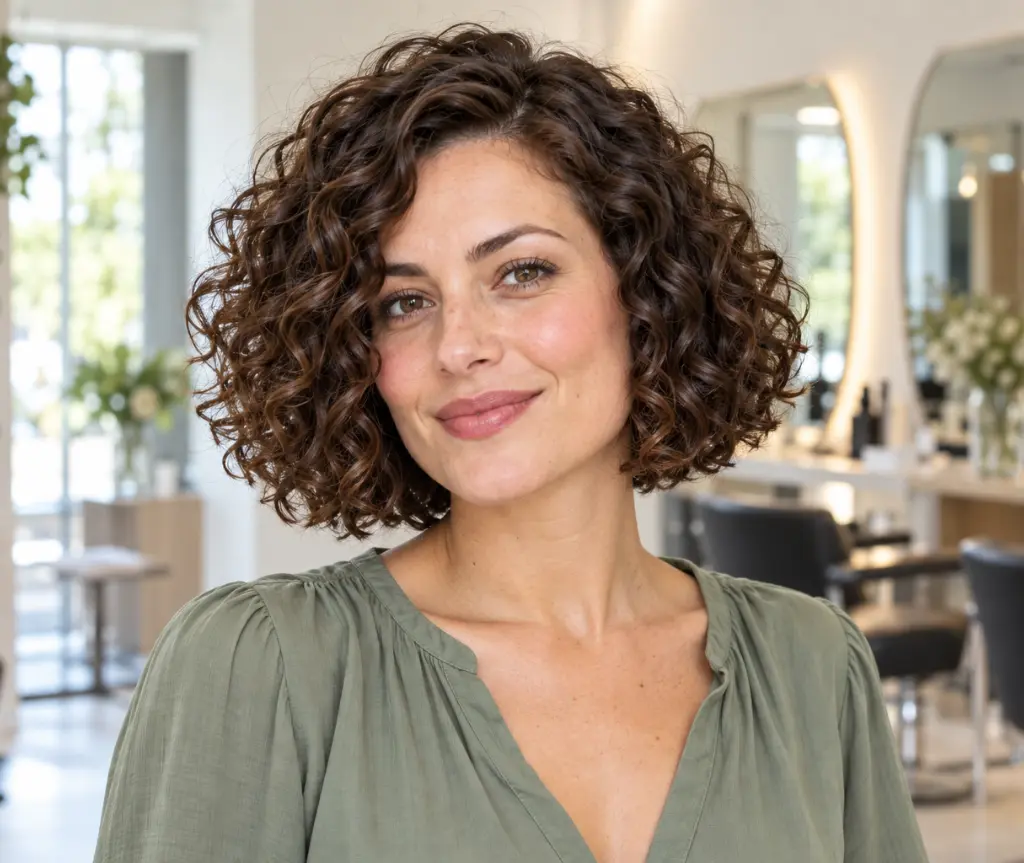
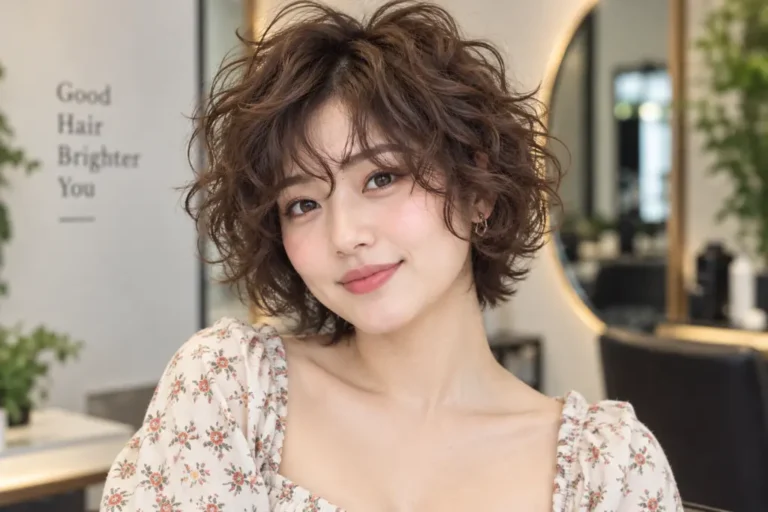
A chin-length curly bob feels playful, fresh, and full of personality. Its shorter perimeter brings attention to the face while allowing natural curls to create their own soft outline. Depending on your texture, the finished shape can look rounded, gently angled, or slightly fuller at the sides. Rather than choosing the length from a straight-haired reference photo, discuss how your curls look when dry. Leaving enough room for shrinkage helps you achieve the chin-length result you want without accidentally ending up with a much shorter haircut.
To keep the bob looking defined, distribute styling products through small sections instead of coating only the surface. A lightweight foam or gel can be a useful starting point if rich creams make your curls look flat. Shape the front curls with your fingers while they are damp, then leave them alone as they dry. When refreshing the style, dampen only the areas that need attention and reshape those curls individually. Avoid pulling the sides down repeatedly, since stretching and handling them can change the silhouette you carefully created.
3. Curly Lob with a Soft Side Part
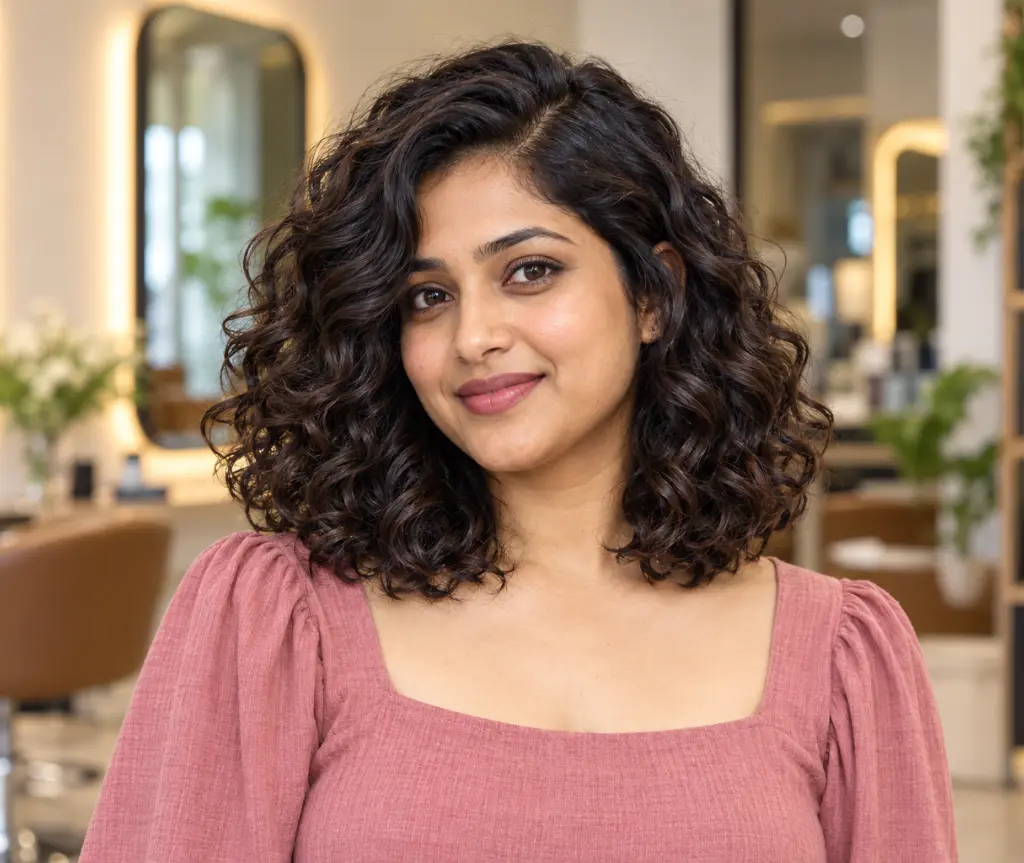
A curly lob, or long bob, is a versatile option for anyone who likes a little extra length around the shoulders. The soft side part gives the hairstyle an asymmetrical feel without requiring a dramatic cut or complicated styling technique. One side can sit closer to the face while the other opens around the cheekbone, creating an attractive frame. Keep the perimeter substantial if you enjoy fullness, and discuss light internal shaping with your stylist if your curls tend to form a wide, bottom-heavy outline.
Style the part while your hair is wet or damp so you do not need to rake through finished curls later. Apply your chosen curl styler evenly, paying attention to the ends where definition can look less consistent. If you use a diffuser, start with a comfortable low airflow setting and avoid blowing the curls around unnecessarily. Allow the style to finish drying before judging the volume. For a quick touch-up, tuck one side loosely behind the ear or secure it with a small clip rather than repeatedly brushing it smooth.
4. Rounded Curly Pixie
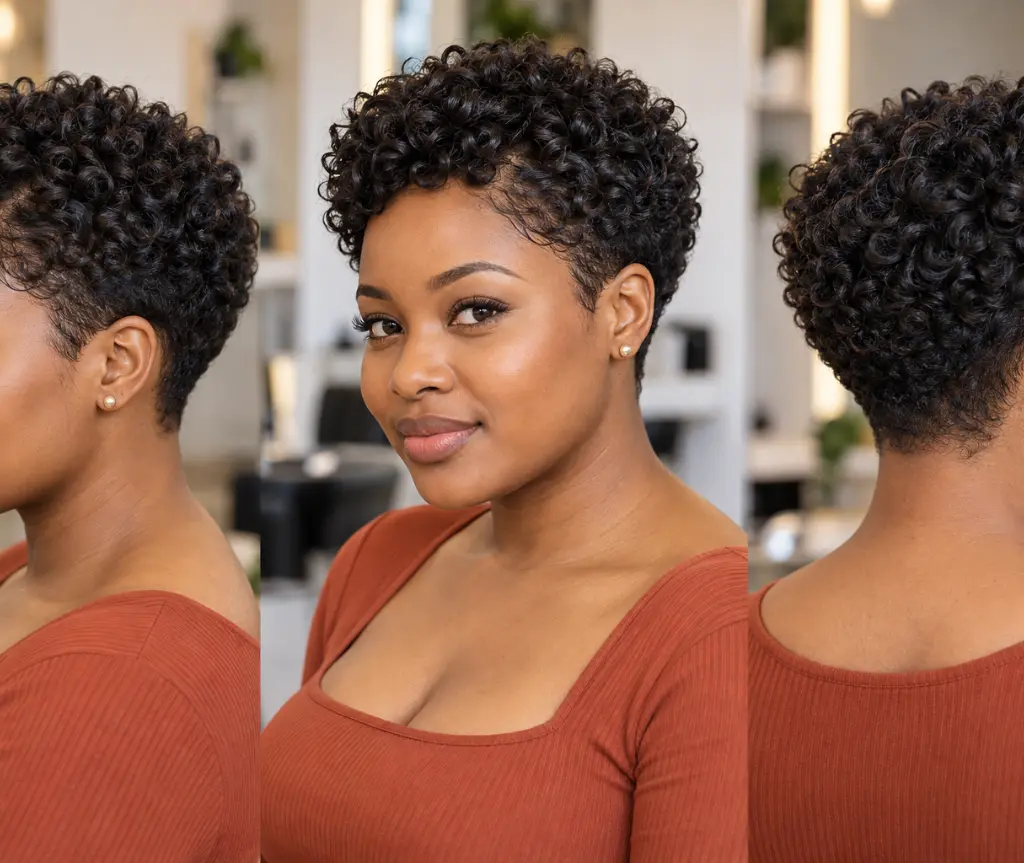
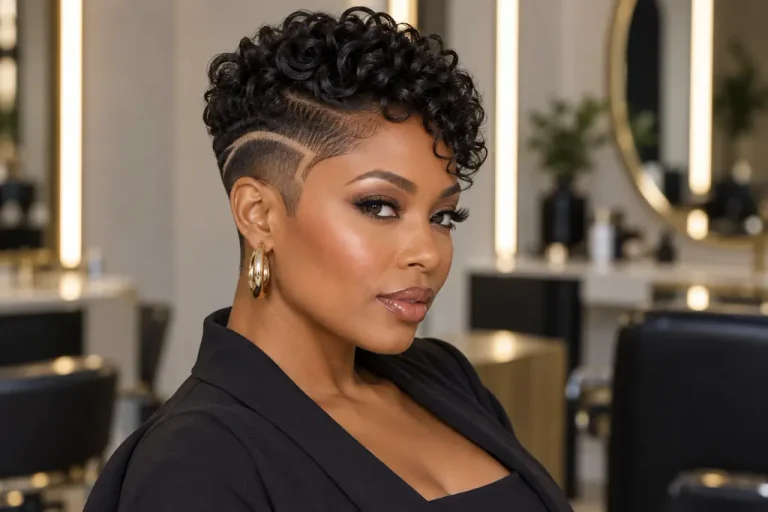
A rounded curly pixie brings natural texture into a compact, expressive haircut. Longer curls across the crown and front create softness, while shorter sides and a neat nape keep the outline intentional. This hairstyle can be adapted to loose curls, small ringlets, or tighter coils, but the proportions should reflect your actual texture. Bring reference images that resemble your curl size rather than focusing only on the model’s face. A well-planned curly pixie should look attractive from the side and back as well as from the front.
Because the hair is short, a little product can make a noticeable difference to the finish. Start with a modest amount of curl cream or gel and add more only where the curls need support. Use your fingertips to position the front section without pressing the entire crown flat. If some curls dry differently from the rest, rewet and reshape those pieces instead of adding layers of product everywhere. Regular appointments can help maintain the haircut’s proportions, particularly when the sides grow outward faster than the crown appears to gain length.
5. Curly Shag with Wispy Bangs
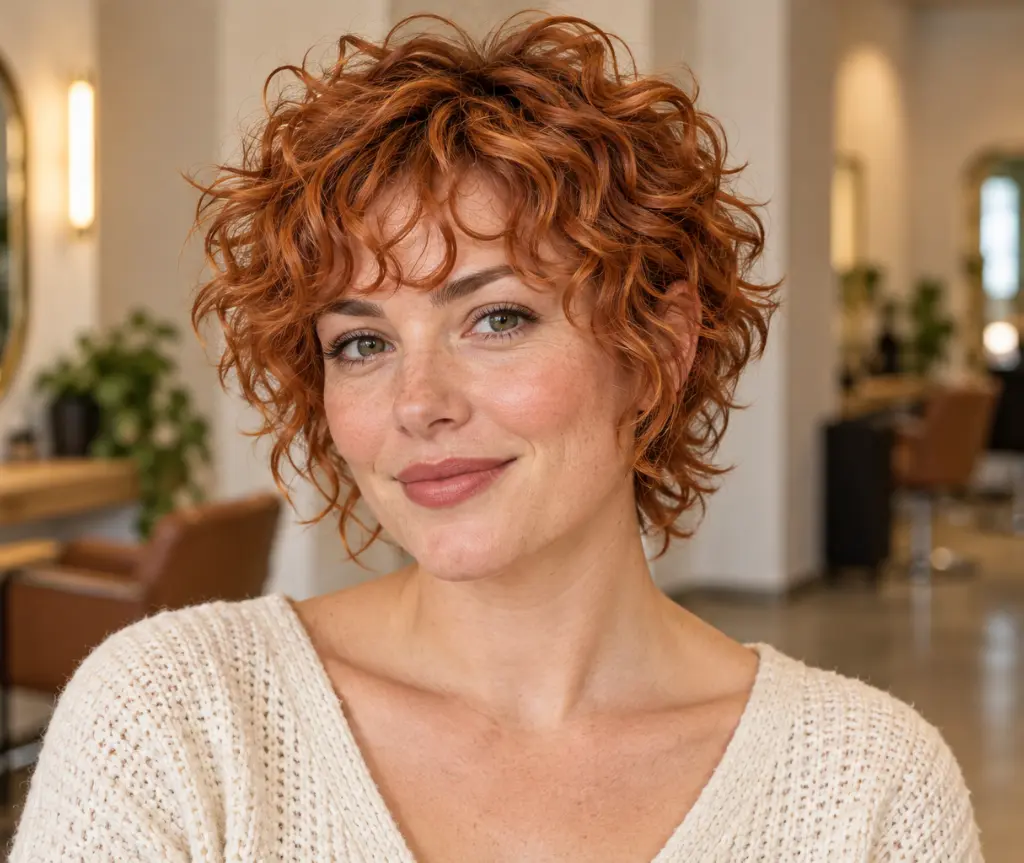
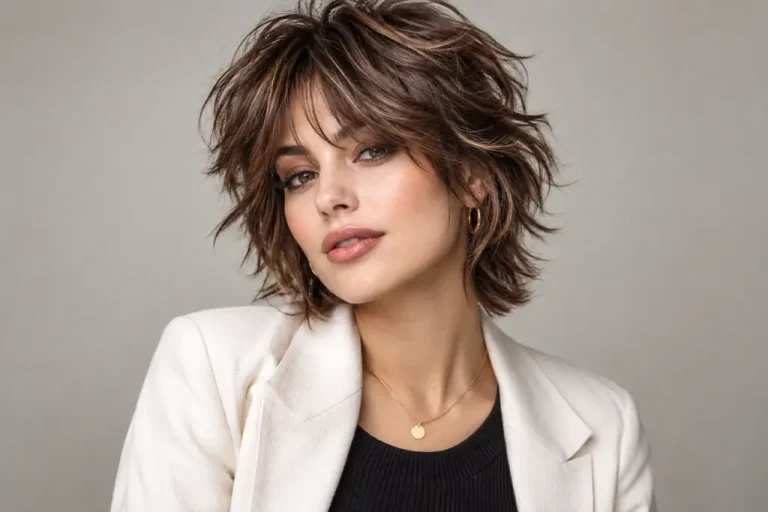
A curly shag with wispy bangs is ideal when you love an airy, expressive hairstyle with plenty of movement. Its shorter crown layers and varied lengths create a relaxed silhouette, while the fringe connects the haircut to the face. The bangs should be planned around how your front curls naturally spring up, separate, and change direction. Instead of asking for a straight, uniform fringe, consider a few softly spaced curls across the forehead. This approach gives the hairstyle character while leaving room for natural texture and everyday variation.
To keep the shag looking intentional, define the shorter layers without coating them in excessively heavy products. Work a small amount of styler through the fringe separately, since bangs often need less product than the longer sections. Let the curls find their natural position before adjusting individual pieces with your fingertips. If the crown becomes fuzzy, refresh a few visible curl groups rather than aggressively scrunching everything again. The finished look can include some softness around the edges; the aim is an attractive shape with recognizable curls, not a rigid helmet.
6. Long Curls with Face-Framing Layers
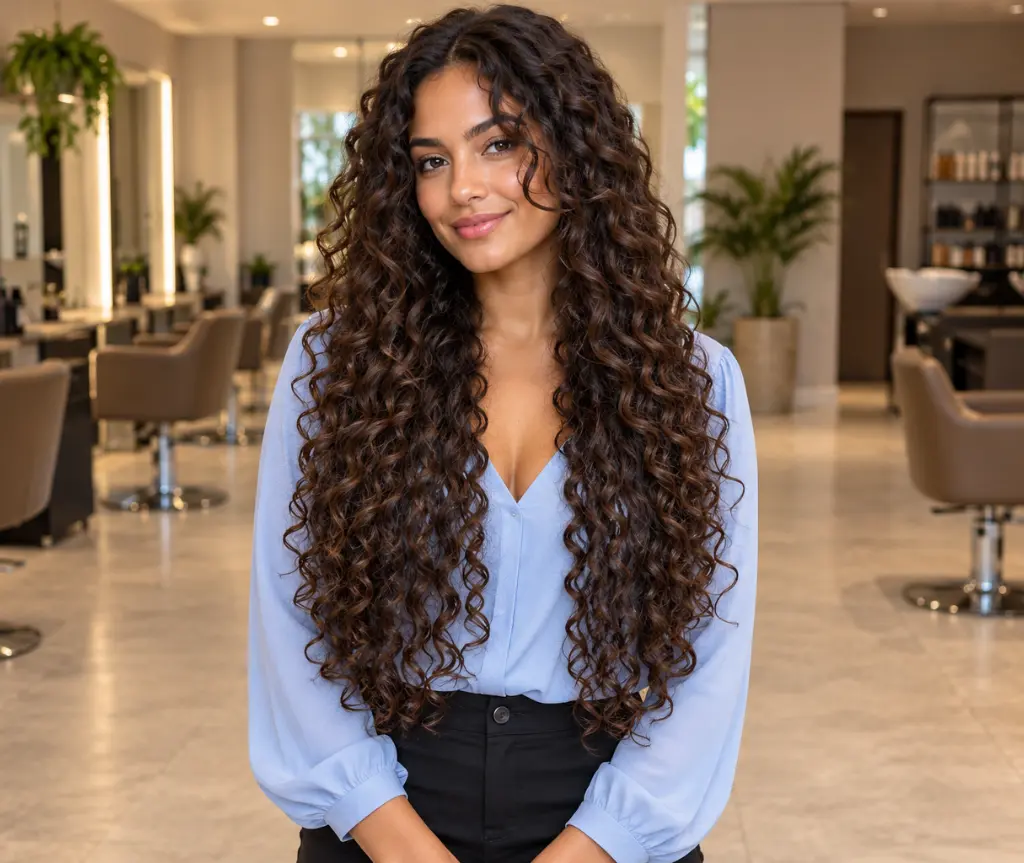
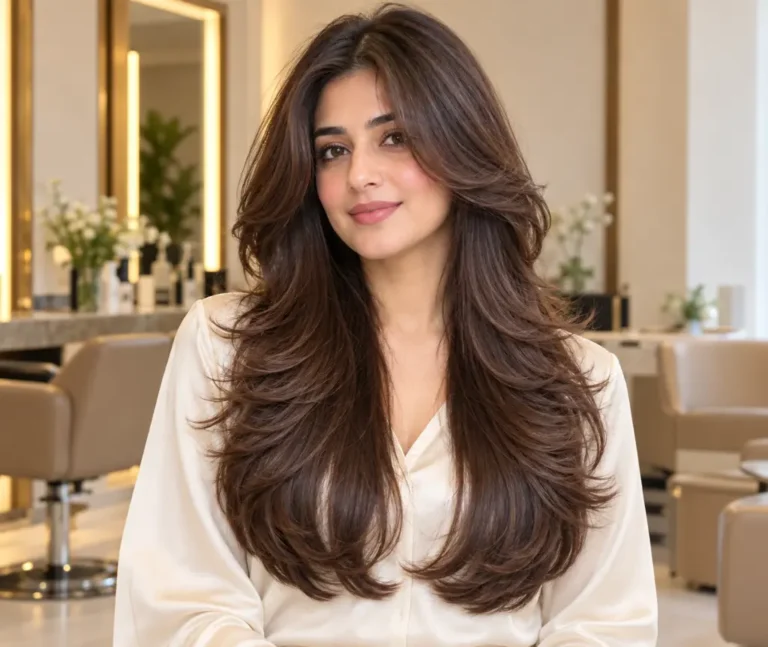
Long curls with face-framing layers offer a romantic look without making every section the same length. Shorter pieces around the cheeks and jaw bring attention to your features, while the longer lengths preserve the flowing effect that many curly-haired women love. The placement of these layers matters more than simply adding lots of them. Ask your stylist how the front sections will behave when your hair dries naturally. If you often wear ponytails or buns, mention that too so the shortest pieces suit your daily routine.
For a more consistent finish, divide long hair into manageable sections before applying your styling products. Check that the middle and lower layers receive enough coverage, since they can be easy to miss when the hair is dense. Finger-shape the face-framing pieces if you want them to curve away from your eyes. Let the lengths dry without constantly moving them between your shoulders. Between washes, focus your refresh on the visible front curls and any flattened sections at the back, using a light touch to preserve the definition that remains.
7. Half-Up Curly Bun
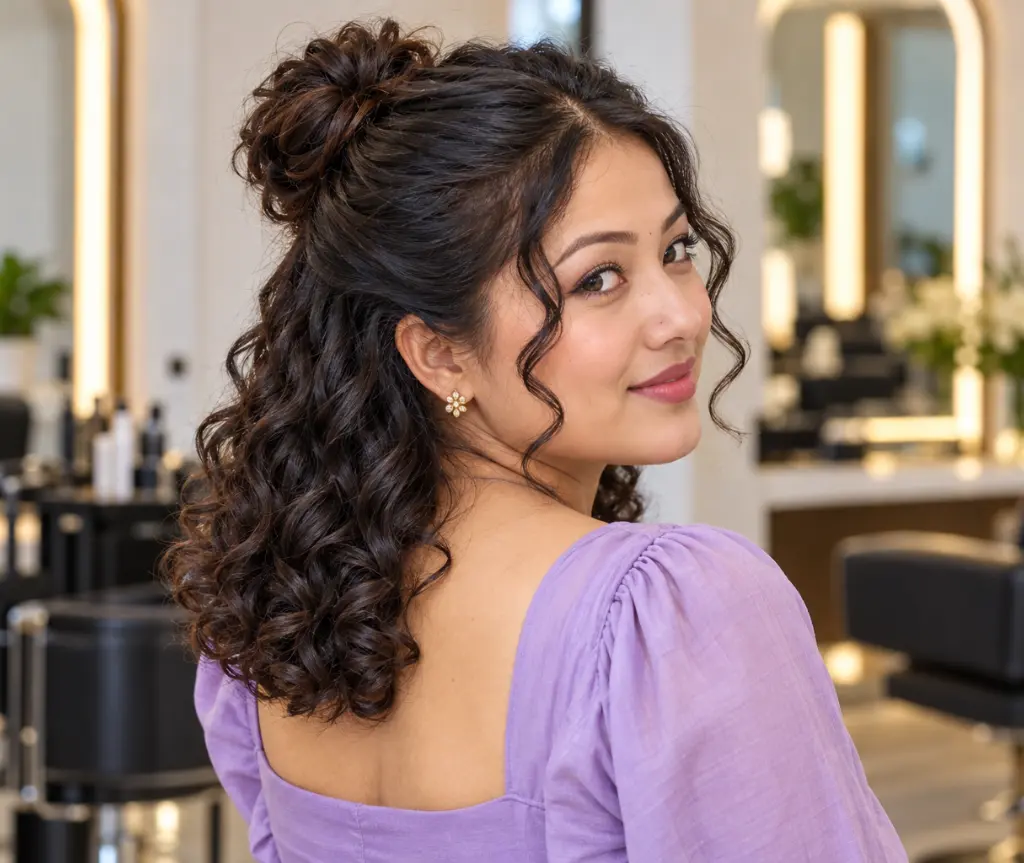
A half-up curly bun combines the charm of loose curls with the practicality of keeping hair away from your face. The upper section forms a small bun, while the lower lengths remain visible around the shoulders or back. It works beautifully when your hair has enough length to gather comfortably without stretching the front too tightly. You can position the bun high for a playful look or slightly lower for a softer finish. Leave a couple of defined curls near the temples if you enjoy a relaxed frame.
Create the style using curls that are already dry and shaped, then gather the upper section gently with your hands. A covered elastic or soft scrunchie can hold the bun without requiring repeated tight wraps. Instead of pulling the crown perfectly smooth, keep some of its natural texture so the upper and lower sections look connected. If the loose ends need refreshing, dampen and reshape them separately. Use a little gel only where you want extra surface control, and avoid adding so much that the top looks stiff beside the flowing curls.
8. High Curly Pineapple Updo
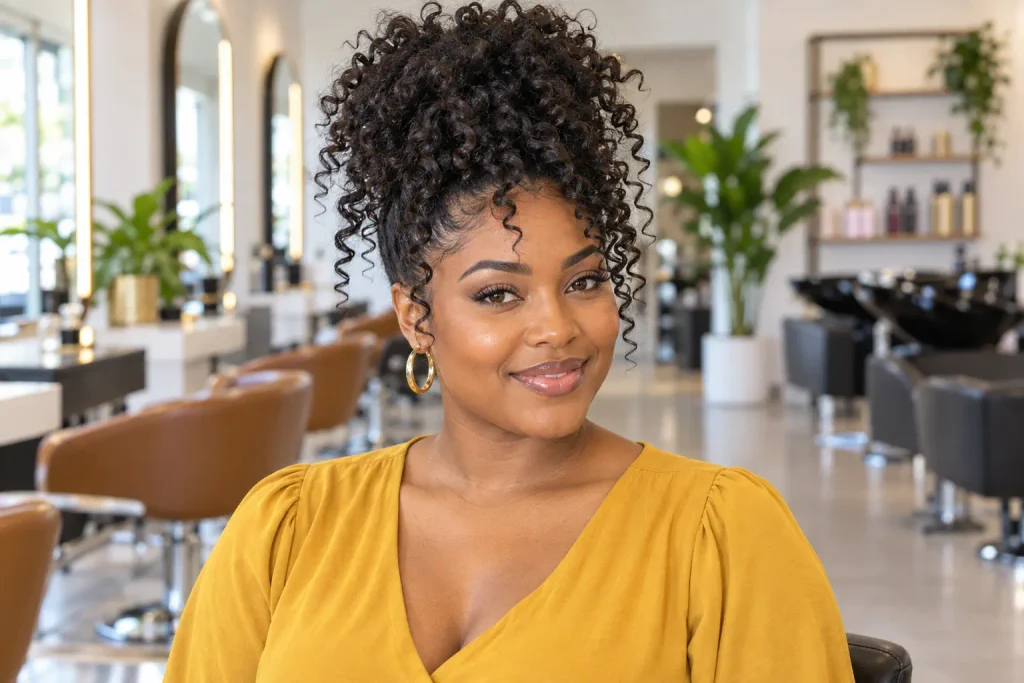
A high curly pineapple updo gathers the hair near the top of the head while allowing the ends to spill forward or outward. The result is cheerful, sculptural, and especially cute on curls that have plenty of natural bounce. Although the pineapple is often associated with nighttime curl preservation, it can also become an attractive daytime hairstyle. Its shape depends on hair length: shorter curls may create a compact cluster, while longer curls form a fuller cascade. Position the base where it feels comfortable rather than forcing every section upward.
Use a loose, covered hair tie and gather the curls with minimal pulling. The base should feel secure enough for your plans without creating pressure around the temples or hairline. Arrange the visible ends individually so they form an appealing outline, and pin any especially long pieces if they fall across your eyes. To tidy the perimeter, smooth a small amount of styler over selected areas with your fingertips. Keep the curl cluster soft and recognizable, since excessive brushing or separation can turn its defined shape into a diffuse cloud.
9. Low Curly Bun with Loose Tendrils
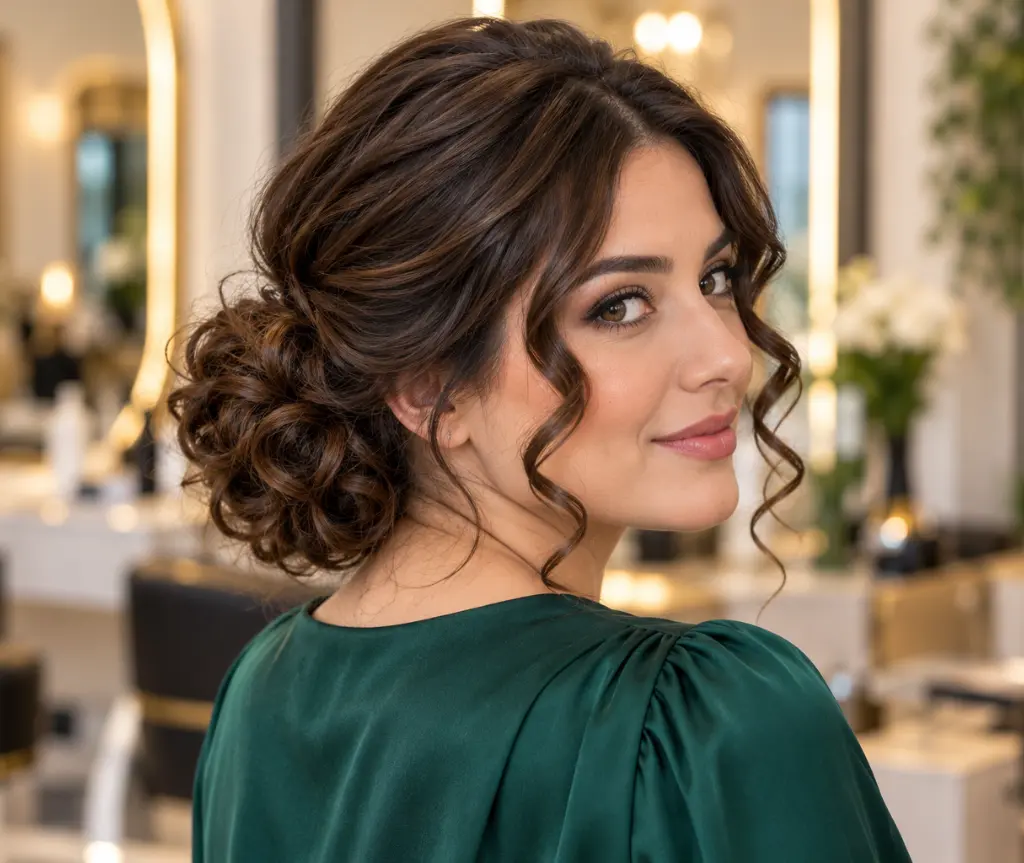
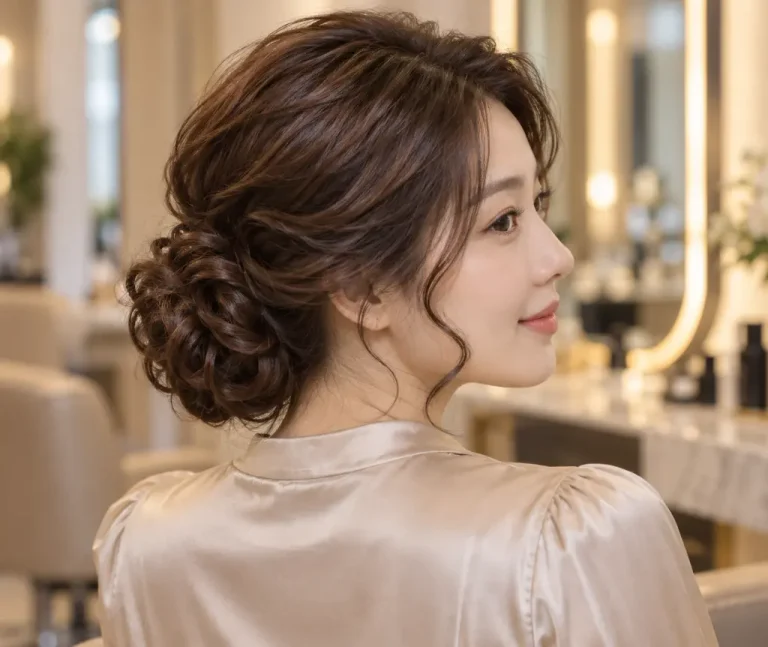
A low curly bun is a lovely choice when you want an elegant hairstyle that still shows your natural texture. Positioned at the nape, the bun can look polished enough for a celebration while remaining comfortable for an ordinary workday. Loose tendrils around the face soften the shape and make the style feel less formal. You do not need to flatten every curl before gathering the hair. A gently arranged bun with visible loops and bends often looks more harmonious with curly hair than a completely smooth, tightly twisted knot.
Start with dry curls, choose your part, and gather the lengths loosely at the back. Fold or twist them into a bun, securing sections with pins rather than relying on a painfully tight elastic. Select the face-framing tendrils deliberately before finishing so you do not have to pull them out of a secured style. If those pieces need definition, dampen and reshape them separately. A small amount of gel can tidy the part or temples, but keep product away from the tendrils if you want them to retain natural bounce.
10. Curly Ponytail with a Wrapped Base
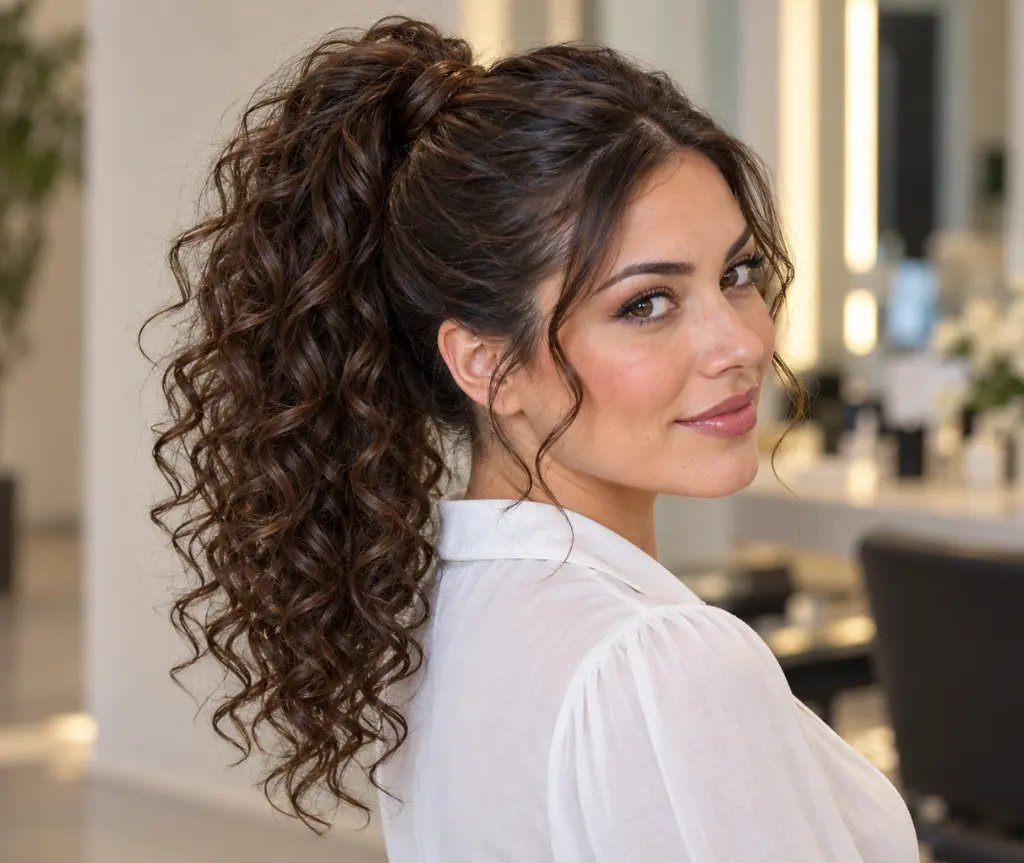
A curly ponytail with a wrapped base gives a familiar everyday hairstyle a more finished appearance. The gathered lengths remain full of ringlets, while a small section of hair conceals the elastic for a neat detail. A mid-height position is particularly versatile because it displays the curls without requiring every strand to reach the top of the head. You can choose a softly textured crown or a smoother surface according to your preference. The ponytail should showcase the natural movement of your hair rather than stretch the curls into straight lengths.
Gather the hair gently once the curls are dry, using your hands to preserve their shape. Secure the ponytail comfortably, then wrap a narrow section around the base and pin its end discreetly. Avoid repeatedly tightening the elastic by pulling the ponytail apart, especially if the style already feels secure. Refresh the visible curls in small groups if necessary, and allow them to settle before adding accessories. For finer hair, keep the wrapped section modest so you do not remove too much volume from the ponytail’s main body and flowing ends.
11. Side-Pinned Curly Hair
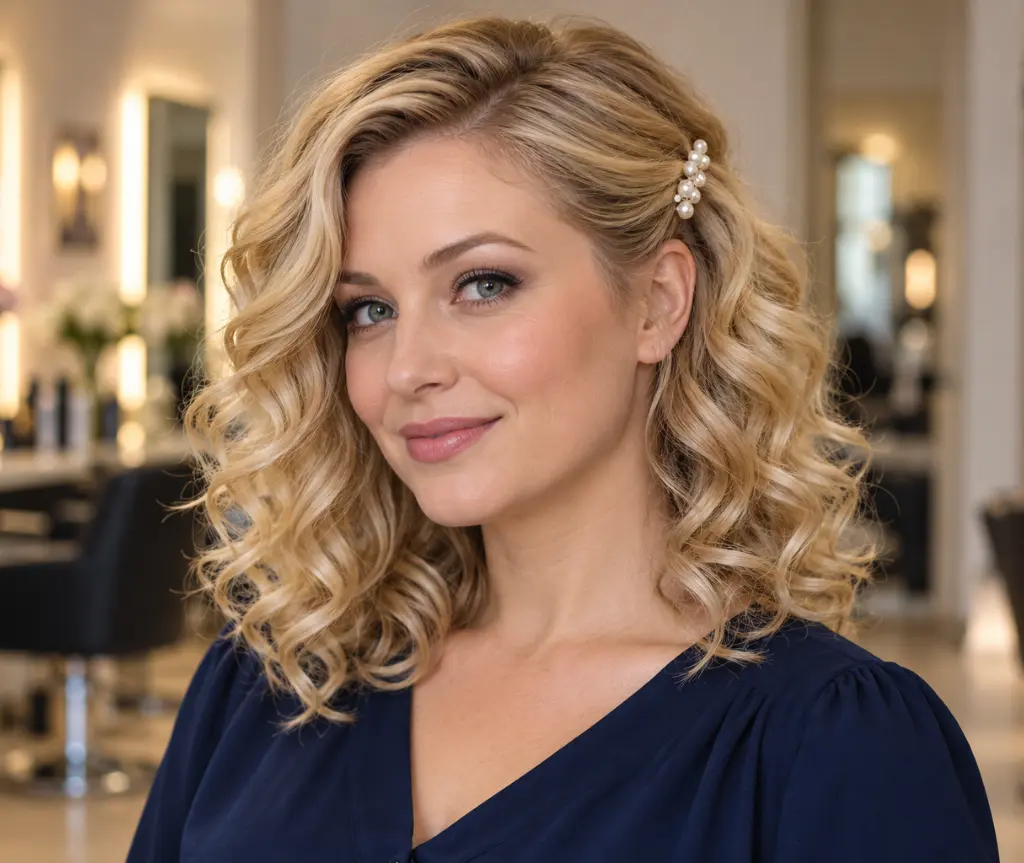
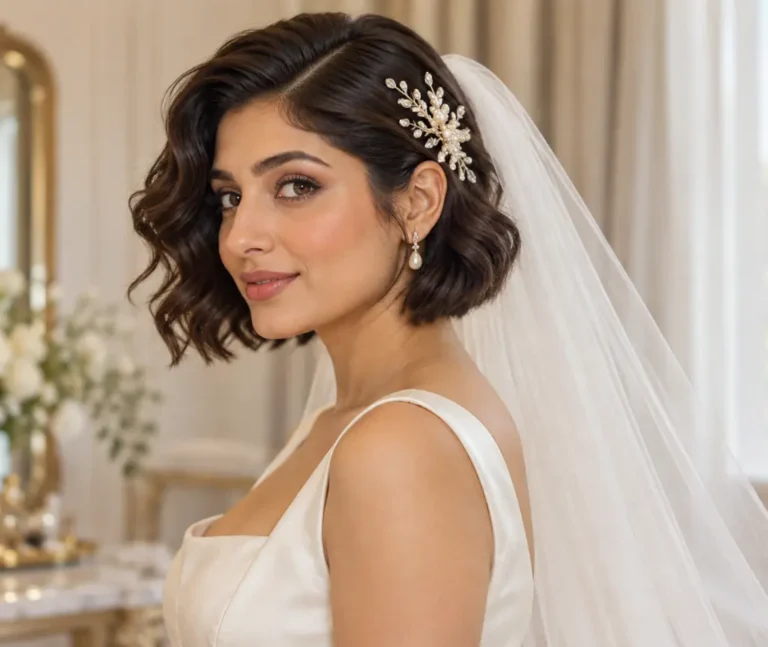
Side-pinned curly hair is an easy way to change your look without committing to a new haircut. A barrette or a few small pins hold one temple section back, creating an open side while the remaining curls fall naturally. This gentle asymmetry looks lovely on curly bobs, shoulder-length cuts, and longer layered hair. Choose an accessory that suits your hair’s density and can hold the section without slipping or squeezing. A pearl clip feels romantic, while a simple metal barrette gives the same hairstyle a clean, understated finish.
Arrange the curls first, then select the section you want to pin so you do not disturb the whole hairstyle. Instead of combing that section completely straight, guide it backward with your fingers and secure it in a comfortable position. If the surrounding curls lose definition, reshape only those pieces with a little water and your usual styler. Avoid opening and closing the clip repeatedly in the same area. Keeping the accessory clear of delicate curl ends makes it easier to remove later without tangling or pulling apart your carefully styled ringlets.
12. Curly Hair with a Satin Headband
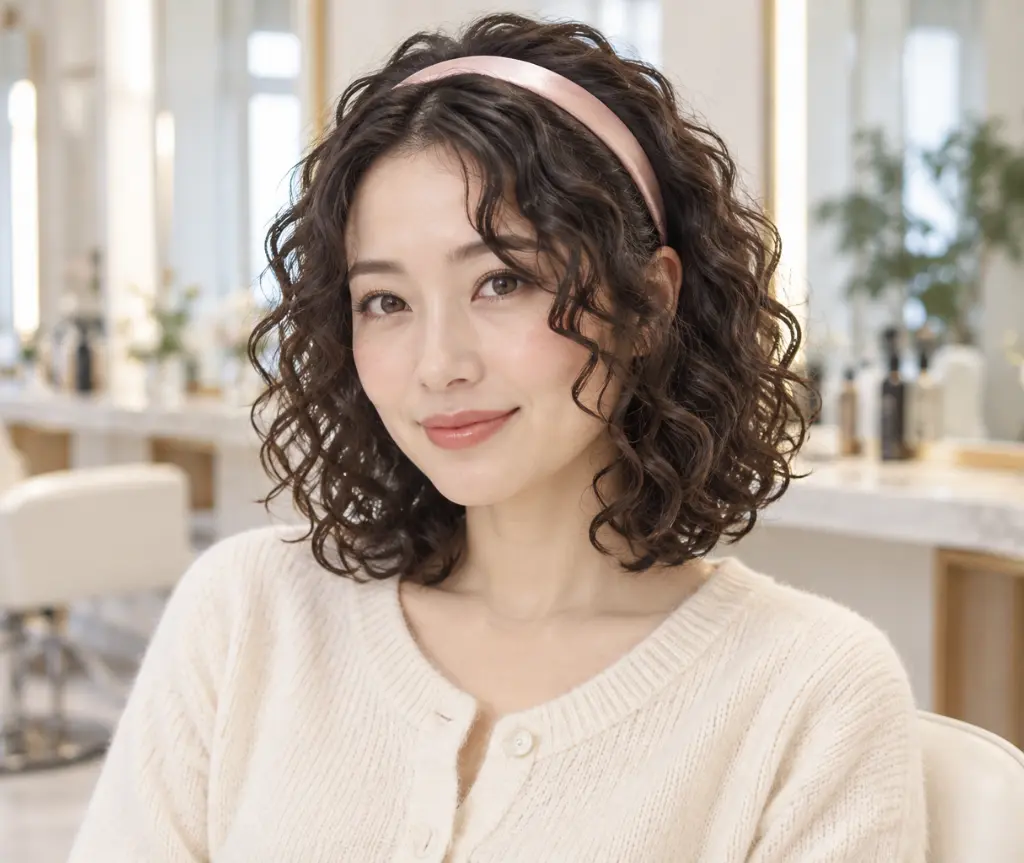
A satin headband adds a cute finishing detail while keeping front curls away from your face. It can complement a short curly bob, a rounded natural hairstyle, or long spirals, making it a versatile accessory rather than a style reserved for one texture. Choose a width that suits the look you want: narrow bands feel subtle, while wider bands create a stronger visual accent. Place the headband slightly behind the hairline if you want to preserve some visible front curls, or farther forward for a more open face.
Before adding the headband, let your curls dry and arrange them into their preferred shape. Slide or place the accessory carefully so it does not drag through the top layer and separate the curl groups. Check that it feels comfortable behind the ears and across the head, especially if you plan to wear it all day. If the crown looks compressed, gently reposition a few curls behind the band. Treat the accessory as a styling aid rather than a substitute for defining your hair, and refresh the exposed ends as needed.
13. Loose Curly Claw-Clip Updo
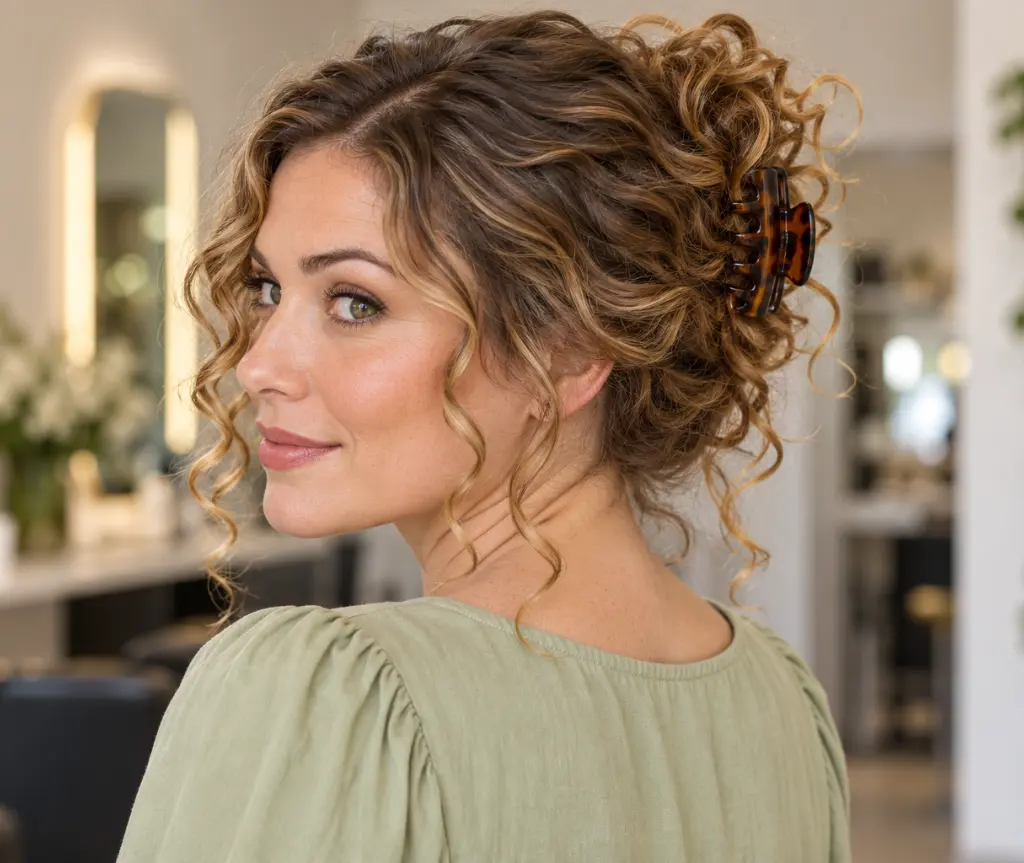
A loose curly claw-clip updo is a practical option when you want your hair gathered quickly while retaining visible texture. Instead of creating a tightly wound twist, fold the lengths upward and let the clip hold the center securely. The curl ends can spill over the top or sit around the sides, depending on your hair length. Choose a clip large enough for the section you are gathering, since an undersized accessory may encourage you to squeeze the hair too firmly or keep adjusting the style throughout the day.
Use dry curls and gather them with your hands, keeping the roots relaxed. Fold the lengths once or twice, then place the clip where its teeth can hold the hair without pressing uncomfortably against your scalp. Leave a few front pieces free if you prefer a softer finish. When the visible curl ends look flattened, refresh those pieces separately rather than soaking the entire updo. Check that the style stays comfortable when you turn your head, and reposition the clip if it catches at the nape or pulls on particular sections.
14. Two Low Curly Puffs
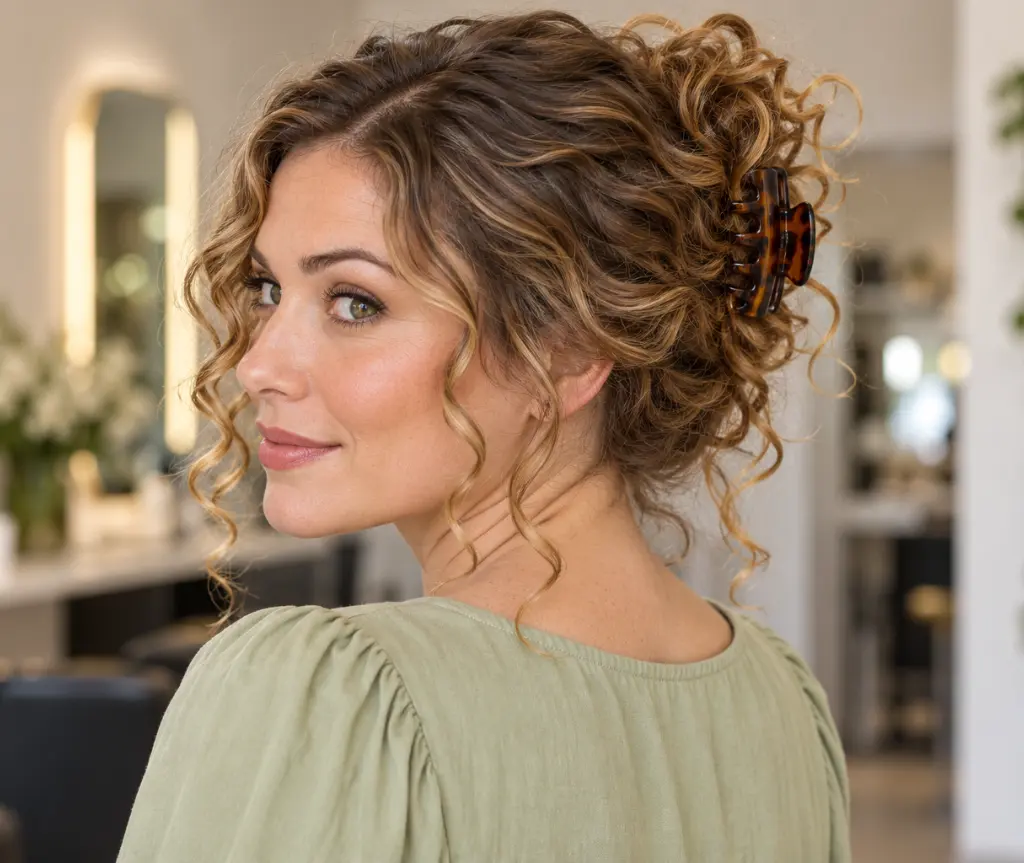
Two low curly puffs create a playful, balanced hairstyle that celebrates natural volume. A center part divides the hair into two sections, with each puff sitting comfortably near the nape or behind the ears. This style is especially charming when the gathered ends form rounded clusters of curls or coils. The puffs do not need to match perfectly to look attractive, since natural density and curl direction can vary across the head. Focus on comfortable placement and a tidy part rather than forcing identical shapes through excessive pulling.
Work with gently detangled hair and secure each section using a soft covered band. Leave enough slack that the style does not feel tight around the edges, then arrange the puffs with your fingertips. You can define a few outer curls to create a clearer outline without separating every strand. If you prefer a smoother front, use a small amount of gel locally instead of coating the entire head. Release the style when it begins to feel uncomfortable, and avoid making tight fastening a daily requirement for achieving the look.
15. Defined Twist-Out Curls
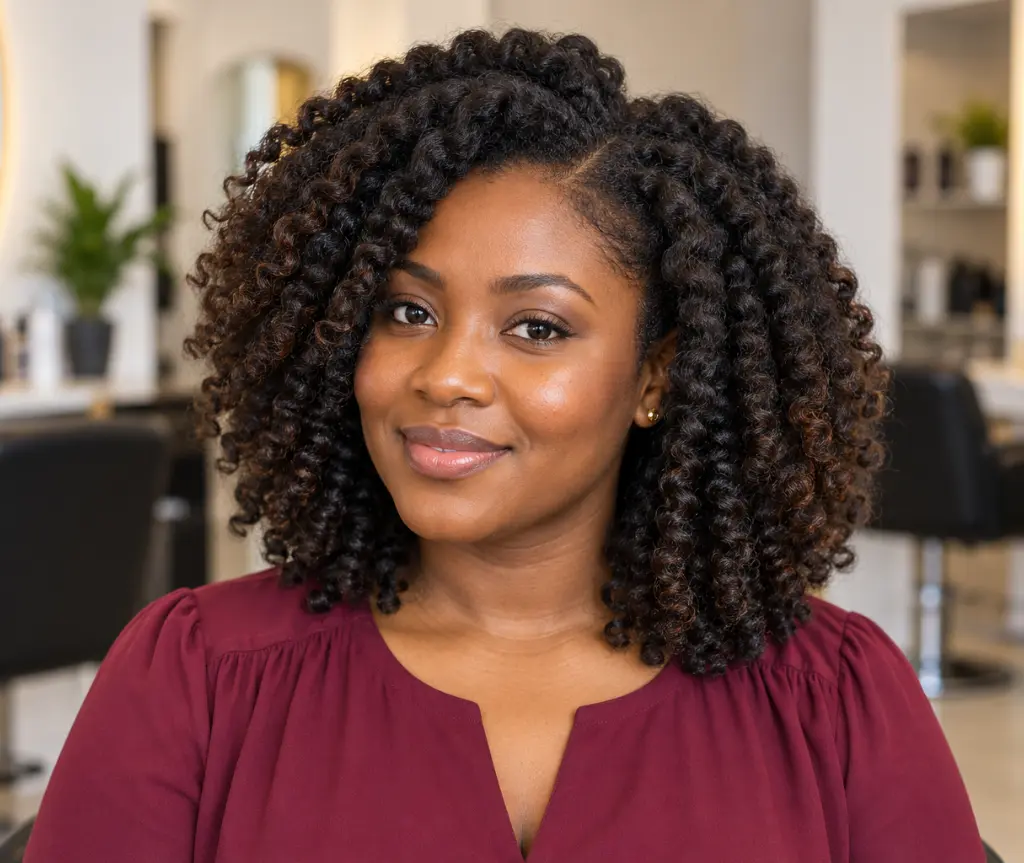
A defined twist-out creates a beautiful set of repeating bends and curls after two-strand twists are released. It offers a different finish from your untouched curl pattern, with the final shape influenced by section size, hair length, and the way you separate the twists. Larger sections can create a softer, fuller result, while smaller sections produce more detailed definition. This hairstyle is particularly appealing when you enjoy a rounded silhouette and want to plan your styling in stages rather than arranging every visible curl individually on the same morning.
Apply your chosen styler evenly, form the twists, and allow them to dry completely before unraveling. Opening damp twists can leave the result less defined than you intended. Separate each twist gently, following the way the sections naturally come apart instead of pulling them into many tiny pieces immediately. Add volume gradually at the roots if you want a fuller outline, keeping your fingers away from the defined ends as much as possible. If certain sections lose their shape between washes, retwist those areas selectively instead of restarting the entire hairstyle.
16. Defined Braid-Out Hairstyle
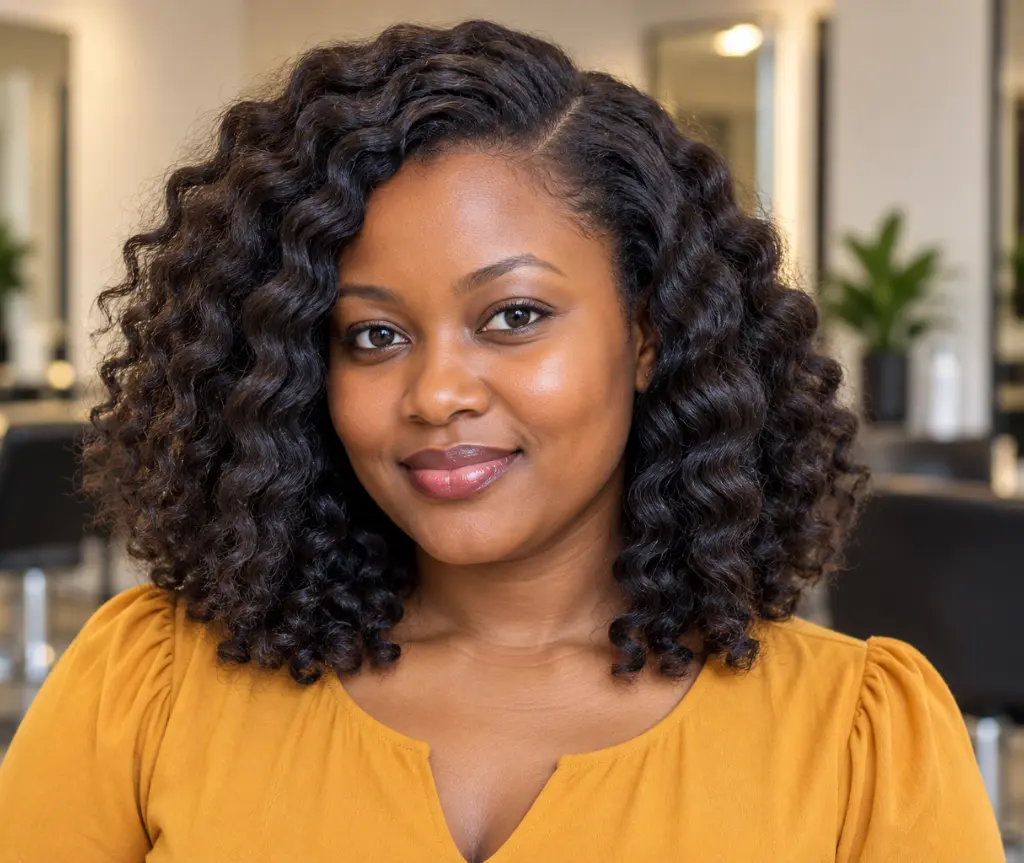
A braid-out gives naturally textured hair a repeating wave pattern with plenty of body. Unlike a twist-out, its bends follow the structure created by three-strand braids, resulting in a distinct crimped or softly waved appearance. The hairstyle can be worn in a rounded shape, parted to one side, or gathered into a loose half-up arrangement. Choose braid sizes that suit the amount of detail you want, and consider how much time you have for both drying and unraveling. The finished result should feel practical for your routine as well as attractive.
Braid gently detangled sections with even product distribution, keeping the tension comfortable from roots to ends. Allow every section to dry fully before taking the braids down, paying particular attention to dense areas that may stay damp longer. Unravel carefully and separate only as much as needed to achieve your desired volume. Too much handling can soften the wave pattern before you have finished arranging it. Shape the outline with your hands, and preserve the more defined sections when refreshing so you do not turn the whole style into an uneven mixture.
17. Finger-Coiled Curly Bob
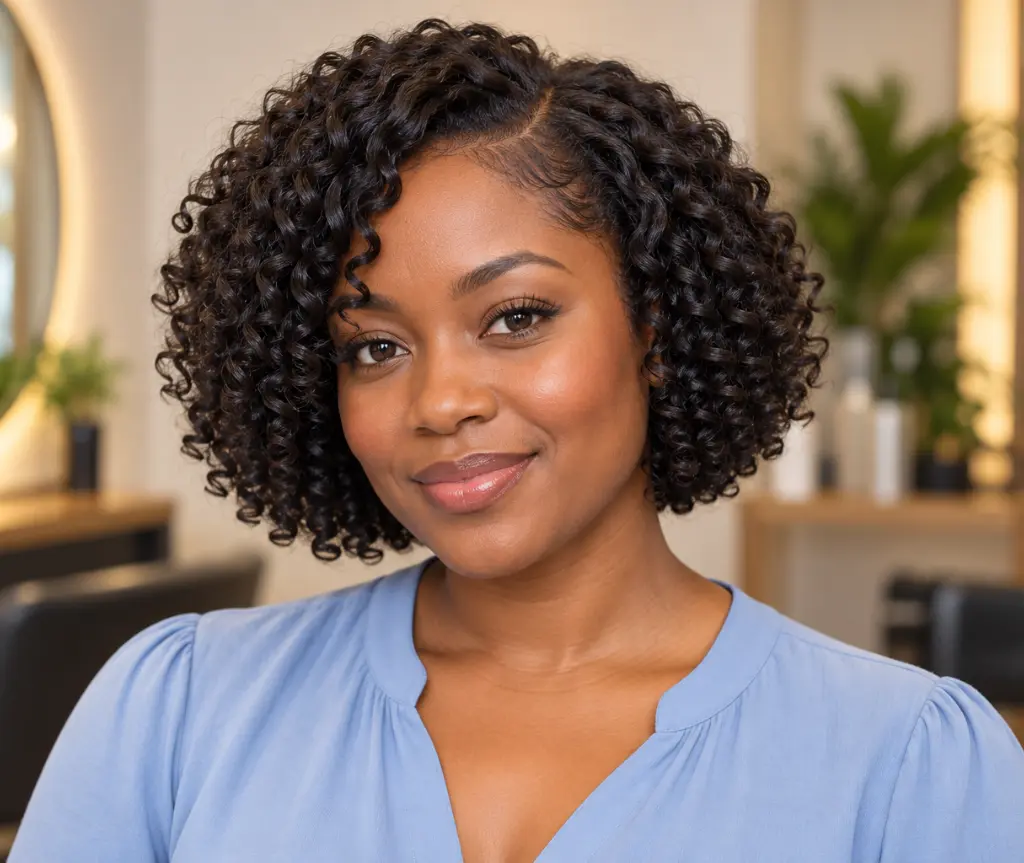
A finger-coiled curly bob highlights individually shaped curls within a compact, face-framing haircut. The technique involves wrapping small damp sections around a finger to encourage a clear curl shape, making it useful when you want more consistency around the front or throughout the bob. The result can look polished while still showing your natural texture, particularly when the coils are not separated excessively afterward. Section size should follow your hair’s behavior rather than an arbitrary standard, since very large sections may not hold the shape you are trying to create.
Apply a suitable styling product before shaping each section, and use gentle tension instead of pulling the hair tightly. You may find that only a few visible curls need finger-coiling, while the rest define well through your usual routine. Allow the coils to dry without repeated touching, then soften the overall look carefully if it feels too structured. When refreshing, rewet selected curls and reshape them individually rather than adding more product to every strand. This targeted approach makes it easier to maintain the bob’s outline without spending unnecessary time on unaffected sections.
18. Tapered Natural Curls
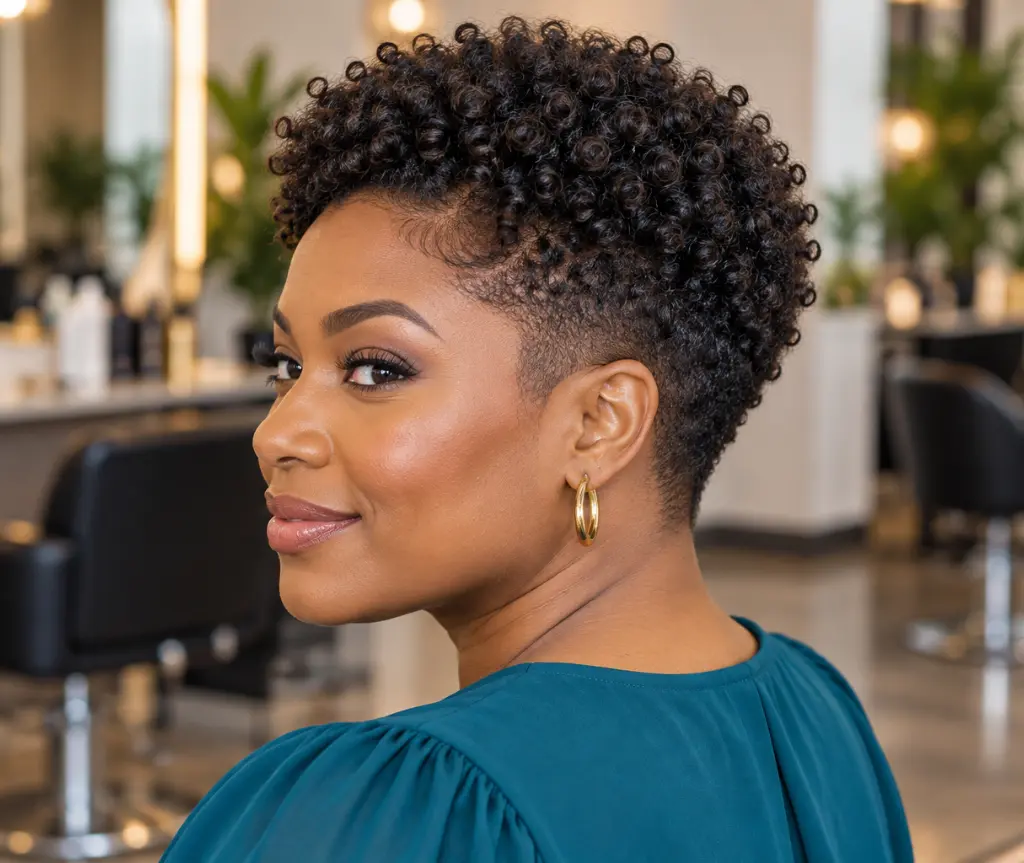
Tapered natural curls combine a fuller top with shorter sides and a gradually narrowed nape. The contrast creates a clear silhouette while allowing the crown’s texture to remain the main feature. This haircut can be subtle and softly rounded or more sculptural, depending on how much length you keep above the temples. Ask your stylist to explain the shape from every angle, especially if you want a feminine outline that still feels easy to maintain. The finished taper should work with your natural growth direction and preferred amount of volume.
Define the longer crown sections according to your texture, using small sections when necessary to distribute the product evenly. The shorter sides often need less styling attention, so avoid automatically applying the same amount everywhere. If you enjoy a directional finish, guide the front curls slightly forward or to one side while damp. Keep the shape comfortable and flexible rather than repeatedly flattening the perimeter. Maintenance appointments can preserve the taper, while selective curl refreshing helps the top look intentional between wash days without requiring a full restyle every time you leave the house.
19. Curly Bob with Curtain Bangs
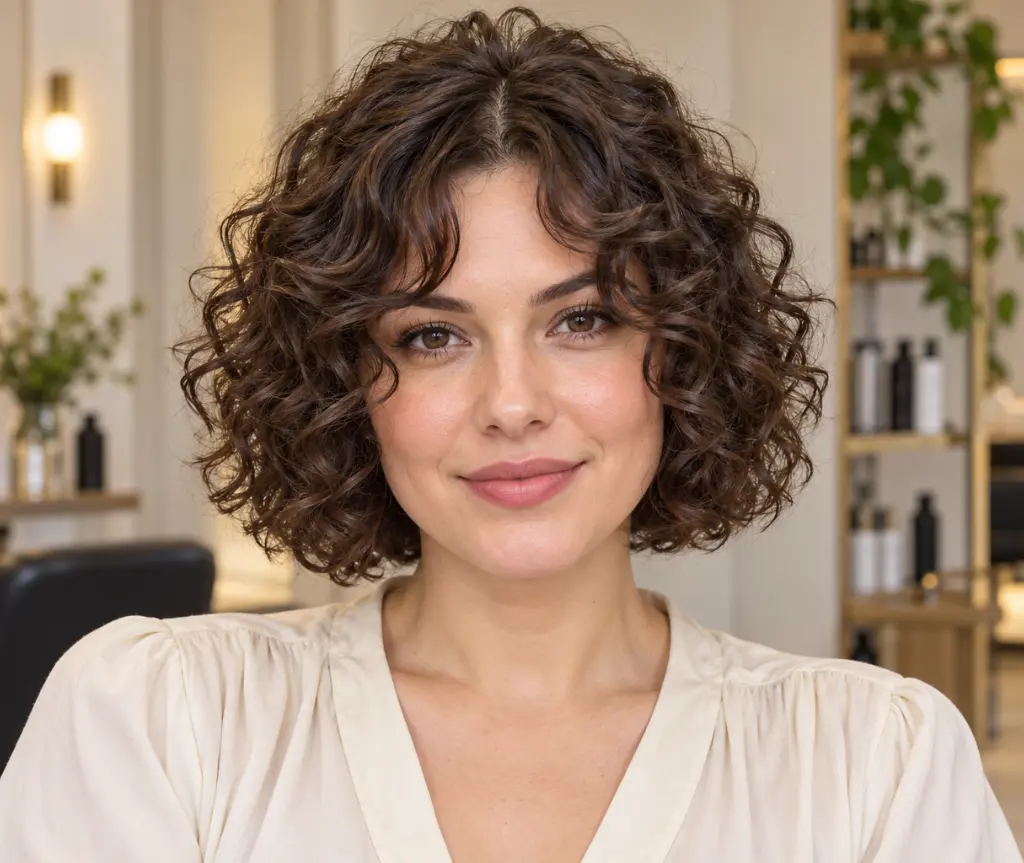
A curly bob with curtain bangs creates a soft frame around the forehead, cheeks, and eyes. The fringe opens near the center and blends into the sides, making the hairstyle feel connected rather than divided into separate sections. Its success depends on the way your front curls behave when dry, so the shortest pieces should be chosen with shrinkage in mind. You may prefer a wider opening if curls easily fall into your eyes, or a fuller fringe if you enjoy a more prominent face-framing effect around your features.
Style the bangs separately from the rest of the bob so you can control their direction without overworking the longer sections. Apply a small amount of styler, guide the curls away from the center opening, and let them settle naturally. If one side dries differently, reshape that area instead of trying to force perfect symmetry throughout the fringe. Avoid repeatedly running your hands through the bangs once they are dry. A couple of carefully defined curl groups often look more appealing than a heavily separated fringe with lots of tiny flyaway strands.
20. Curly Faux Hawk with Pinned Sides
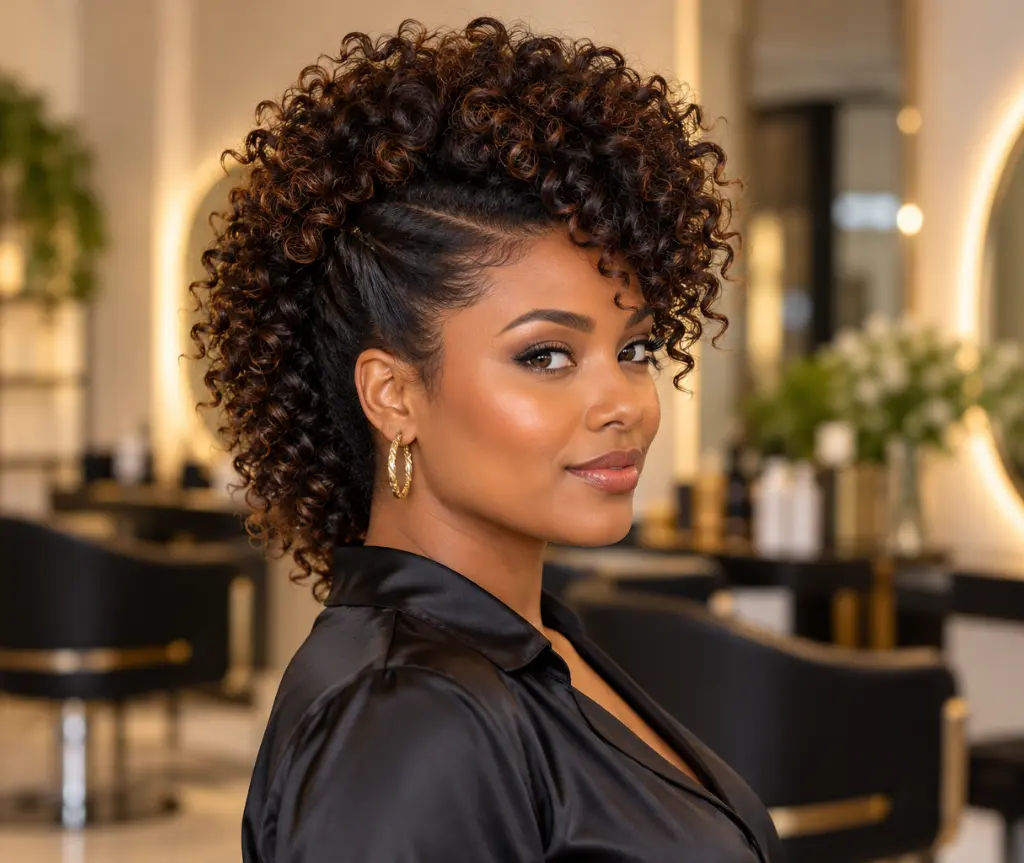
A curly faux hawk creates a striking raised shape through the center while keeping the sides gently pinned close to the head. You can enjoy the silhouette without shaving the sides or changing your haircut permanently. The central curls remain loose and full, making the style a fun choice for evenings, celebrations, or days when you want something more expressive. Its proportions can be adapted to your length: shorter hair forms a compact crest, while longer curls may need several softly pinned sections to create a continuous shape.
Begin with defined dry curls, then gather and secure the side sections without pulling hard around the hairline. Use enough pins to support the shape comfortably rather than placing all the tension on a single area. Arrange the center curls gradually, checking the profile as well as the front view. Refresh a few visible pieces if they need extra definition, and avoid brushing the raised section after it is arranged. The style should feel secure when you move, with pins positioned so they do not press into the scalp or snag loose ends.
21. Half-Up Side Twists with Loose Curls
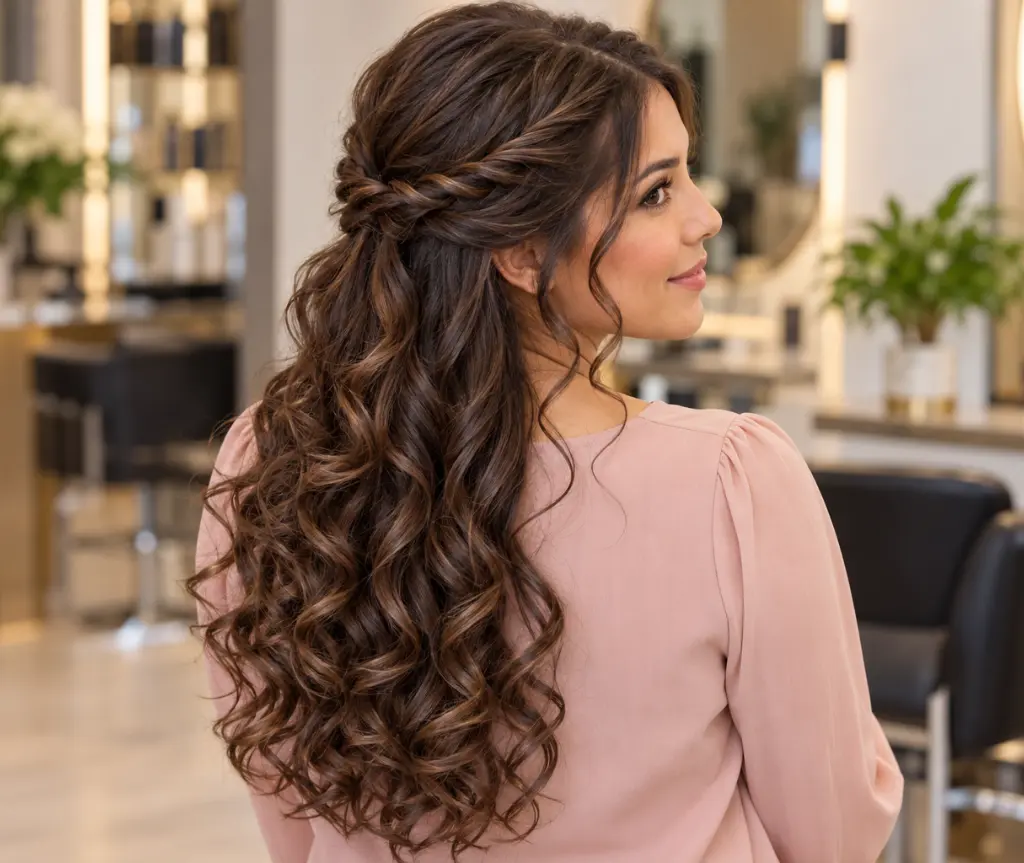
Half-up side twists offer a romantic way to display loose curls while keeping the temple sections neatly arranged. Two small twists travel backward from the sides and meet behind the head, leaving the lower lengths free. The hairstyle works well for occasions when you want something more detailed than a clip but less formal than a full updo. Keep the twists soft enough to blend with your curl texture, and choose a discreet fastening if you want the arrangement itself to stand out more than the accessory.
Create the twists on hair that is already dry and defined, separating the side sections carefully with your fingers. Twist loosely, join them at the back, and secure them without dragging the surrounding curls out of place. If your hair is layered, small pins can hold shorter pieces without requiring extra tension. Leave a few face-framing curls free if that suits your haircut, then refresh those pieces individually. Check the join from the back to make sure the twists sit comfortably and do not create an uneven pull across the crown or temples.
22. Defined Wash-and-Go Curls
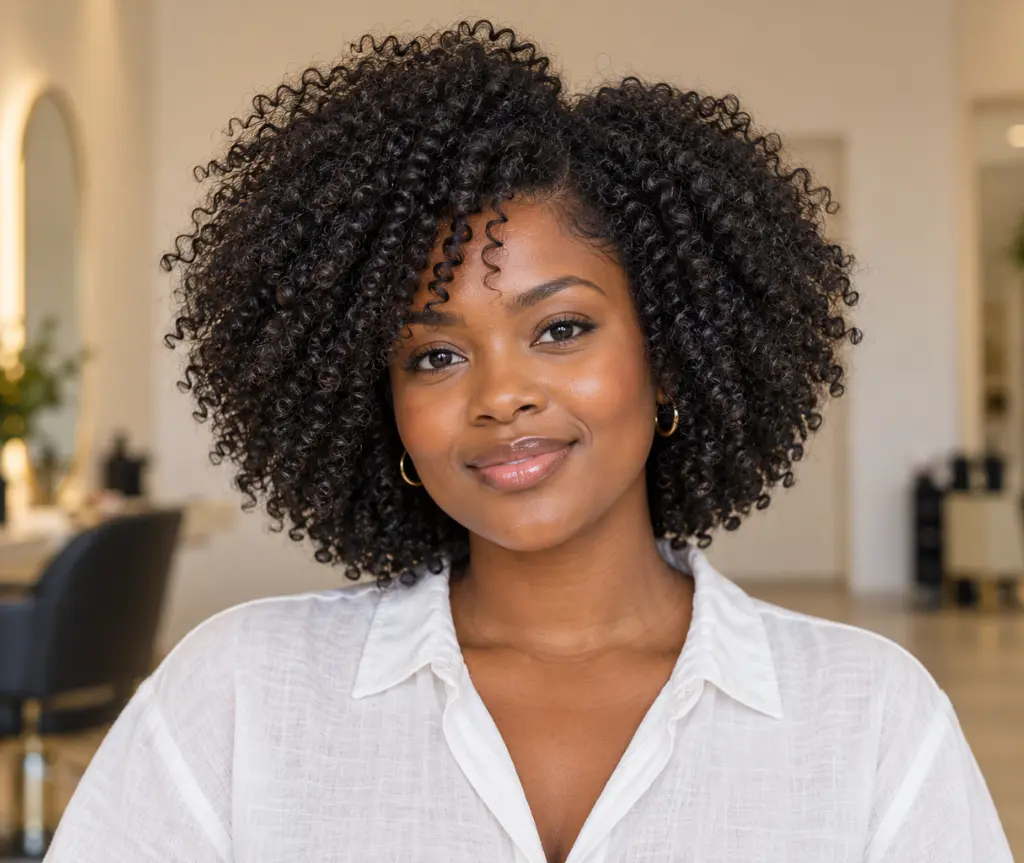
Defined wash-and-go curls put your natural texture at the center of the hairstyle. Despite the name, this look usually involves thoughtful preparation, product application, and drying rather than simply washing and immediately leaving the house. Its beauty comes from letting curls or coils form their own pattern within a flattering haircut. The finished shape might be a rounded afro, a curly bob, or a longer layered silhouette. Choose reference images with a texture similar to yours so your expectations reflect your hair’s natural curl size, density, and shrinkage.
Build a routine you can repeat comfortably, starting with clean, conditioned, gently detangled hair. Apply your chosen styler in sections and pay attention to how much product your hair needs rather than copying someone else’s exact quantity. Let the curl groups settle before drying, and limit unnecessary handling afterward. If the result feels weighed down, adjust the amount or product combination next time instead of layering on more. A successful wash-and-go can include some natural softness and flyaways while still showing attractive definition, movement, and a shape that feels like you.
Conclusion
These 22 cute curly hairstyle ideas that keep frizz in check show how versatile natural curls can be. From playful curly bobs and layered ringlets to soft buns and defined wash-and-go styles, there is a look for every length and occasion. Choose a hairstyle that complements your texture, use styling products suited to your hair, and handle your curls gently to preserve definition. A few flyaways are completely natural, so focus on healthy-looking movement rather than perfection.